Peyton Project - Kitchen
Part 1


9/21/23
Our Vintage Inspired Kitchen Renovation: Part 1
Inspiration, design, and process behind the Mac home kitchen!
We're finally starting our huge kitchen renovation on a budget, and I'm so excited to share the journey with you!
From Bland to Beautiful: The Before and Plan
Our kitchen, while functional, had been yearning for a personality infusion. It was the epitome of builder-grade, lacking the unique style and warmth we craved for our family's hub. But fear not, my DIY warriors! We're about to transform this space into a haven that's both visually stunning and budget-friendly. Here's the blueprint for our makeover magic:
We’re here, ready to guide you through our epic kitchen renovation journey. That's right—we're finally tackling this long-awaited makeover on a budget, and I'm thrilled to have you along for the ride. Today, we're diving into Part 1, where I'll unveil my vision, share the first steps we've taken, and offer some budget-friendly tips you can implement in your own space. Let's dive in!
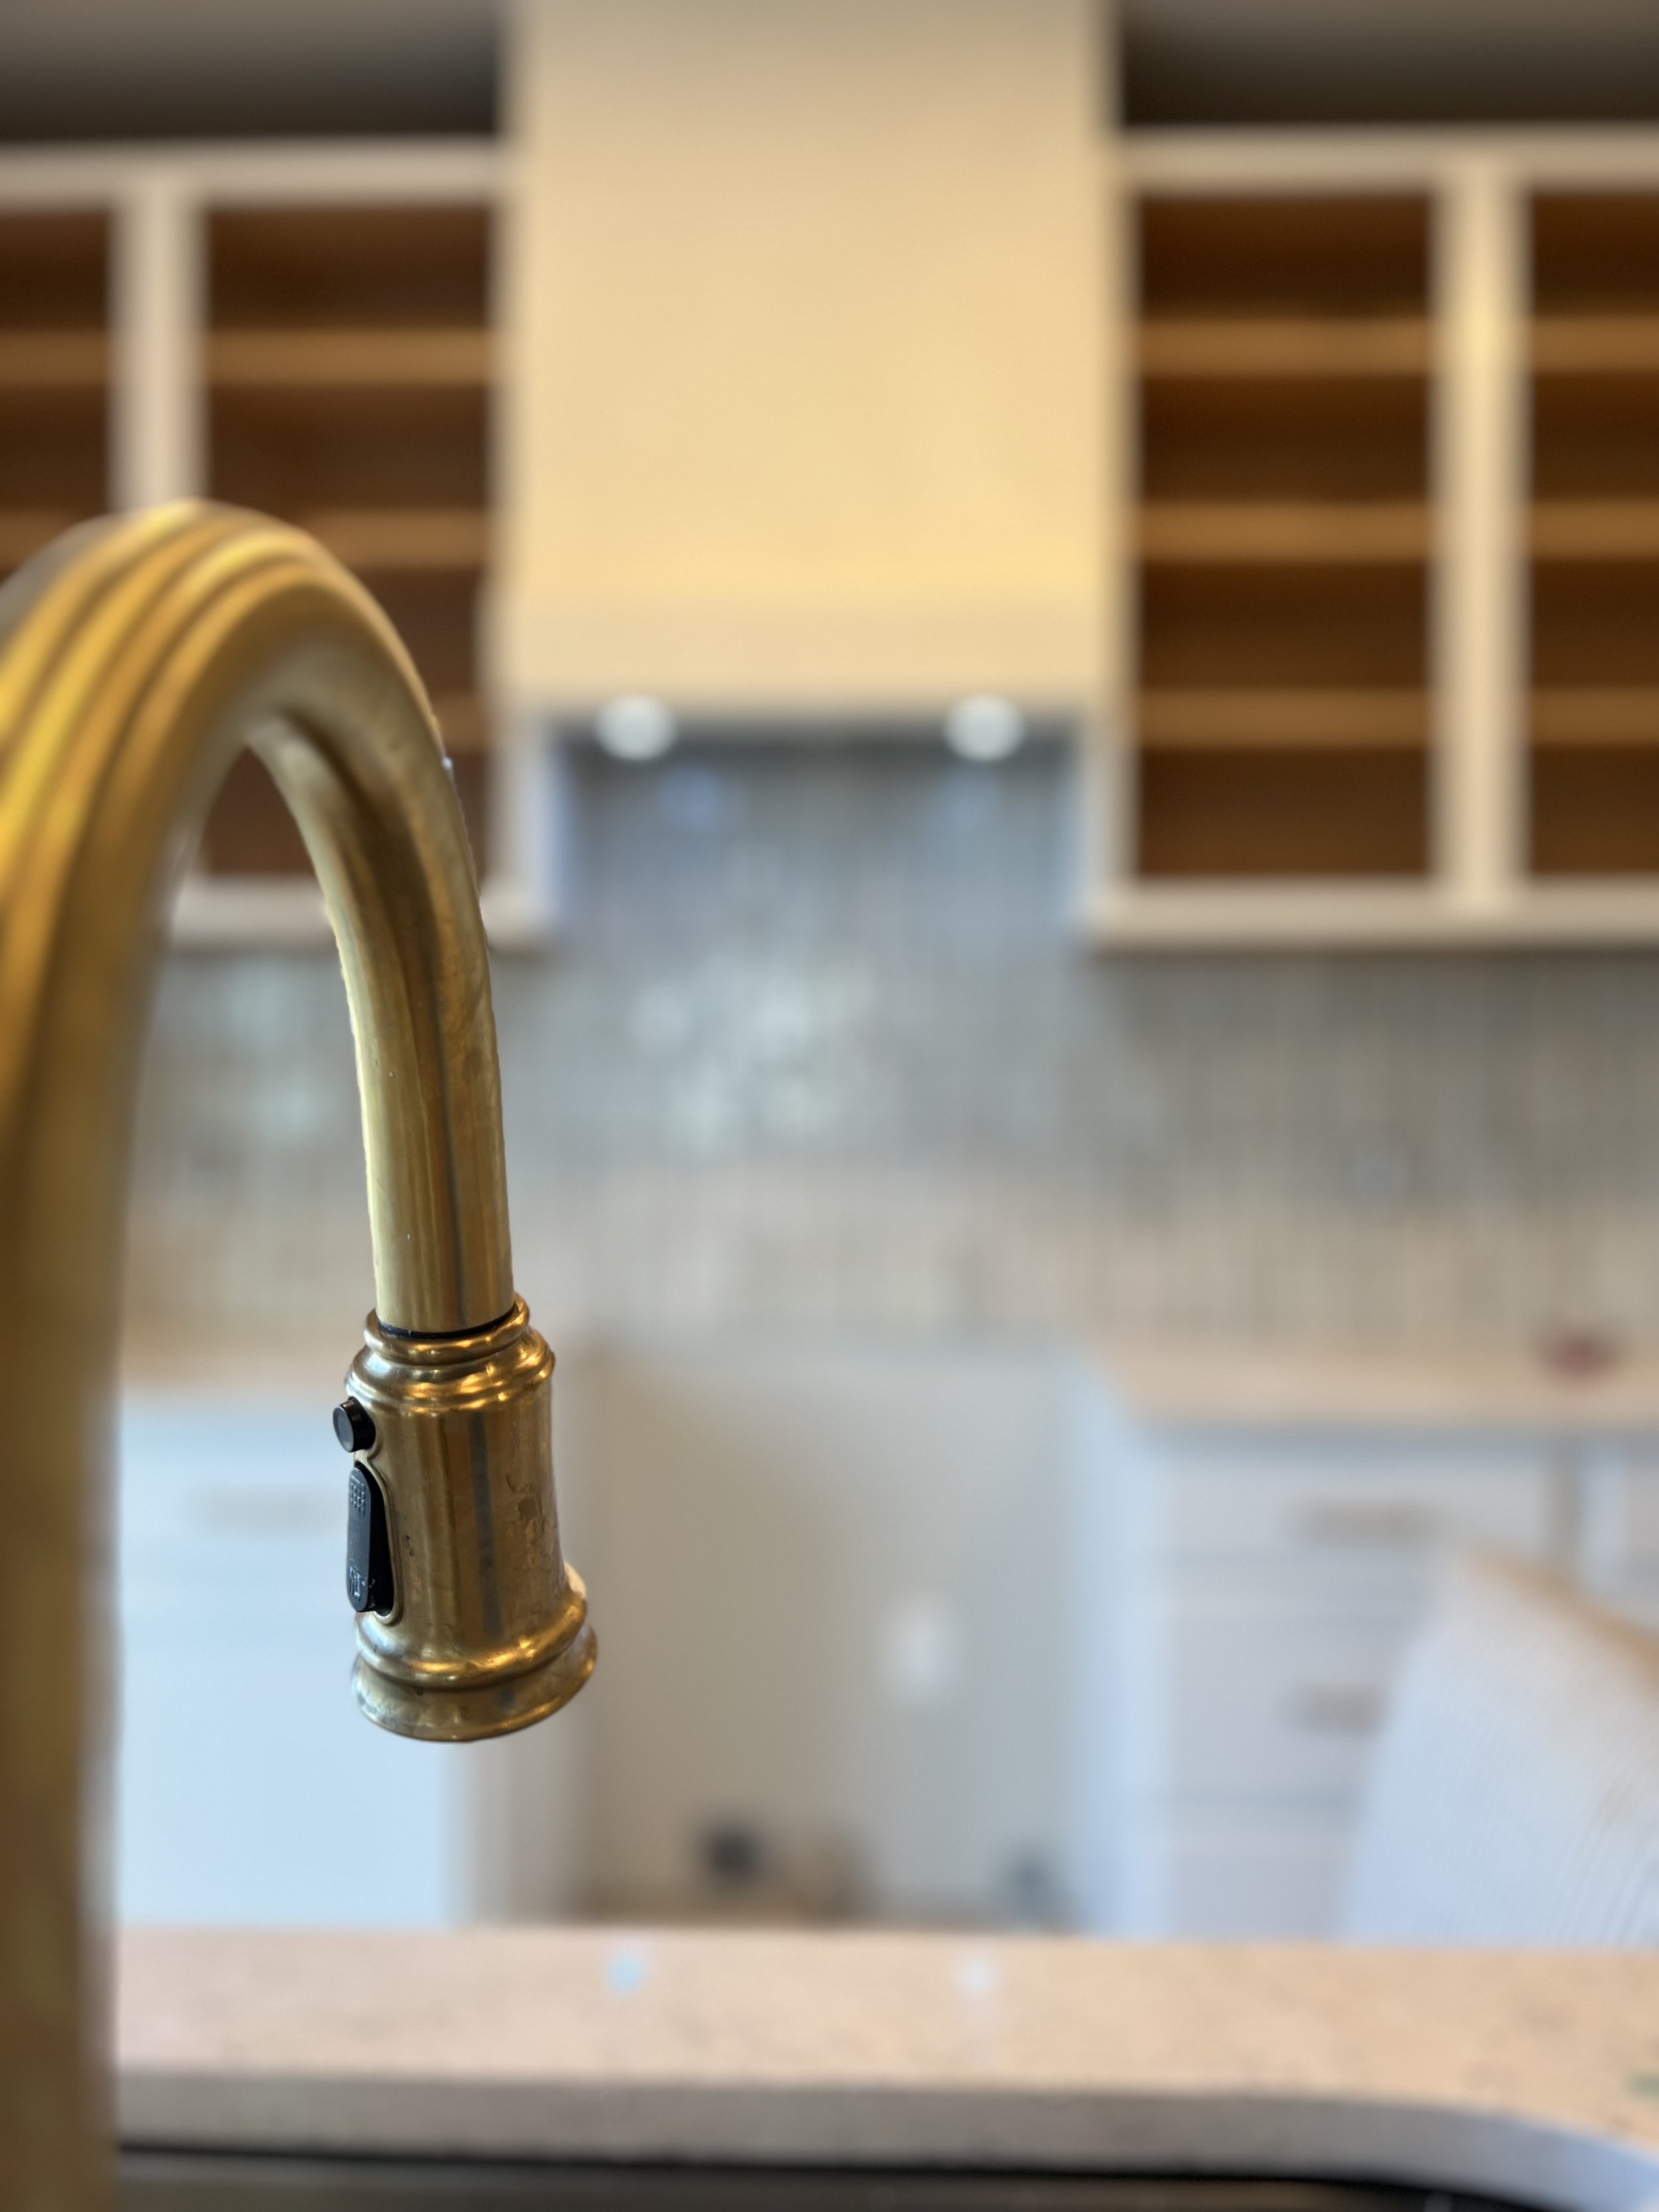
Faucet Fascination: A kitchen's heart lies in its sink, so we're treating ours to a luxurious upgrade. Enter the Moen Align One Handle Modern Kitchen Pulldown Faucet with Reflex and Power Clean technology in brushed gold. ✨ Grab it here - this beauty will add a touch of modern elegance and effortless functionality. We also love the Belsena 2.0 Single Handle Pull Down Sprayer Kitchen Faucet in Brushed Gold find it here whichever you choose make it count and align with your style. Here’s a list of other items we used to stage and decorate the sink area: soap pump, feaux fern, small planter pot, brass ring wreath, feaux leaf stem, fluted stone planter (large size), pot rack, berry bowls, books, marble canister, brass salt + pepper mills, counter chairs,

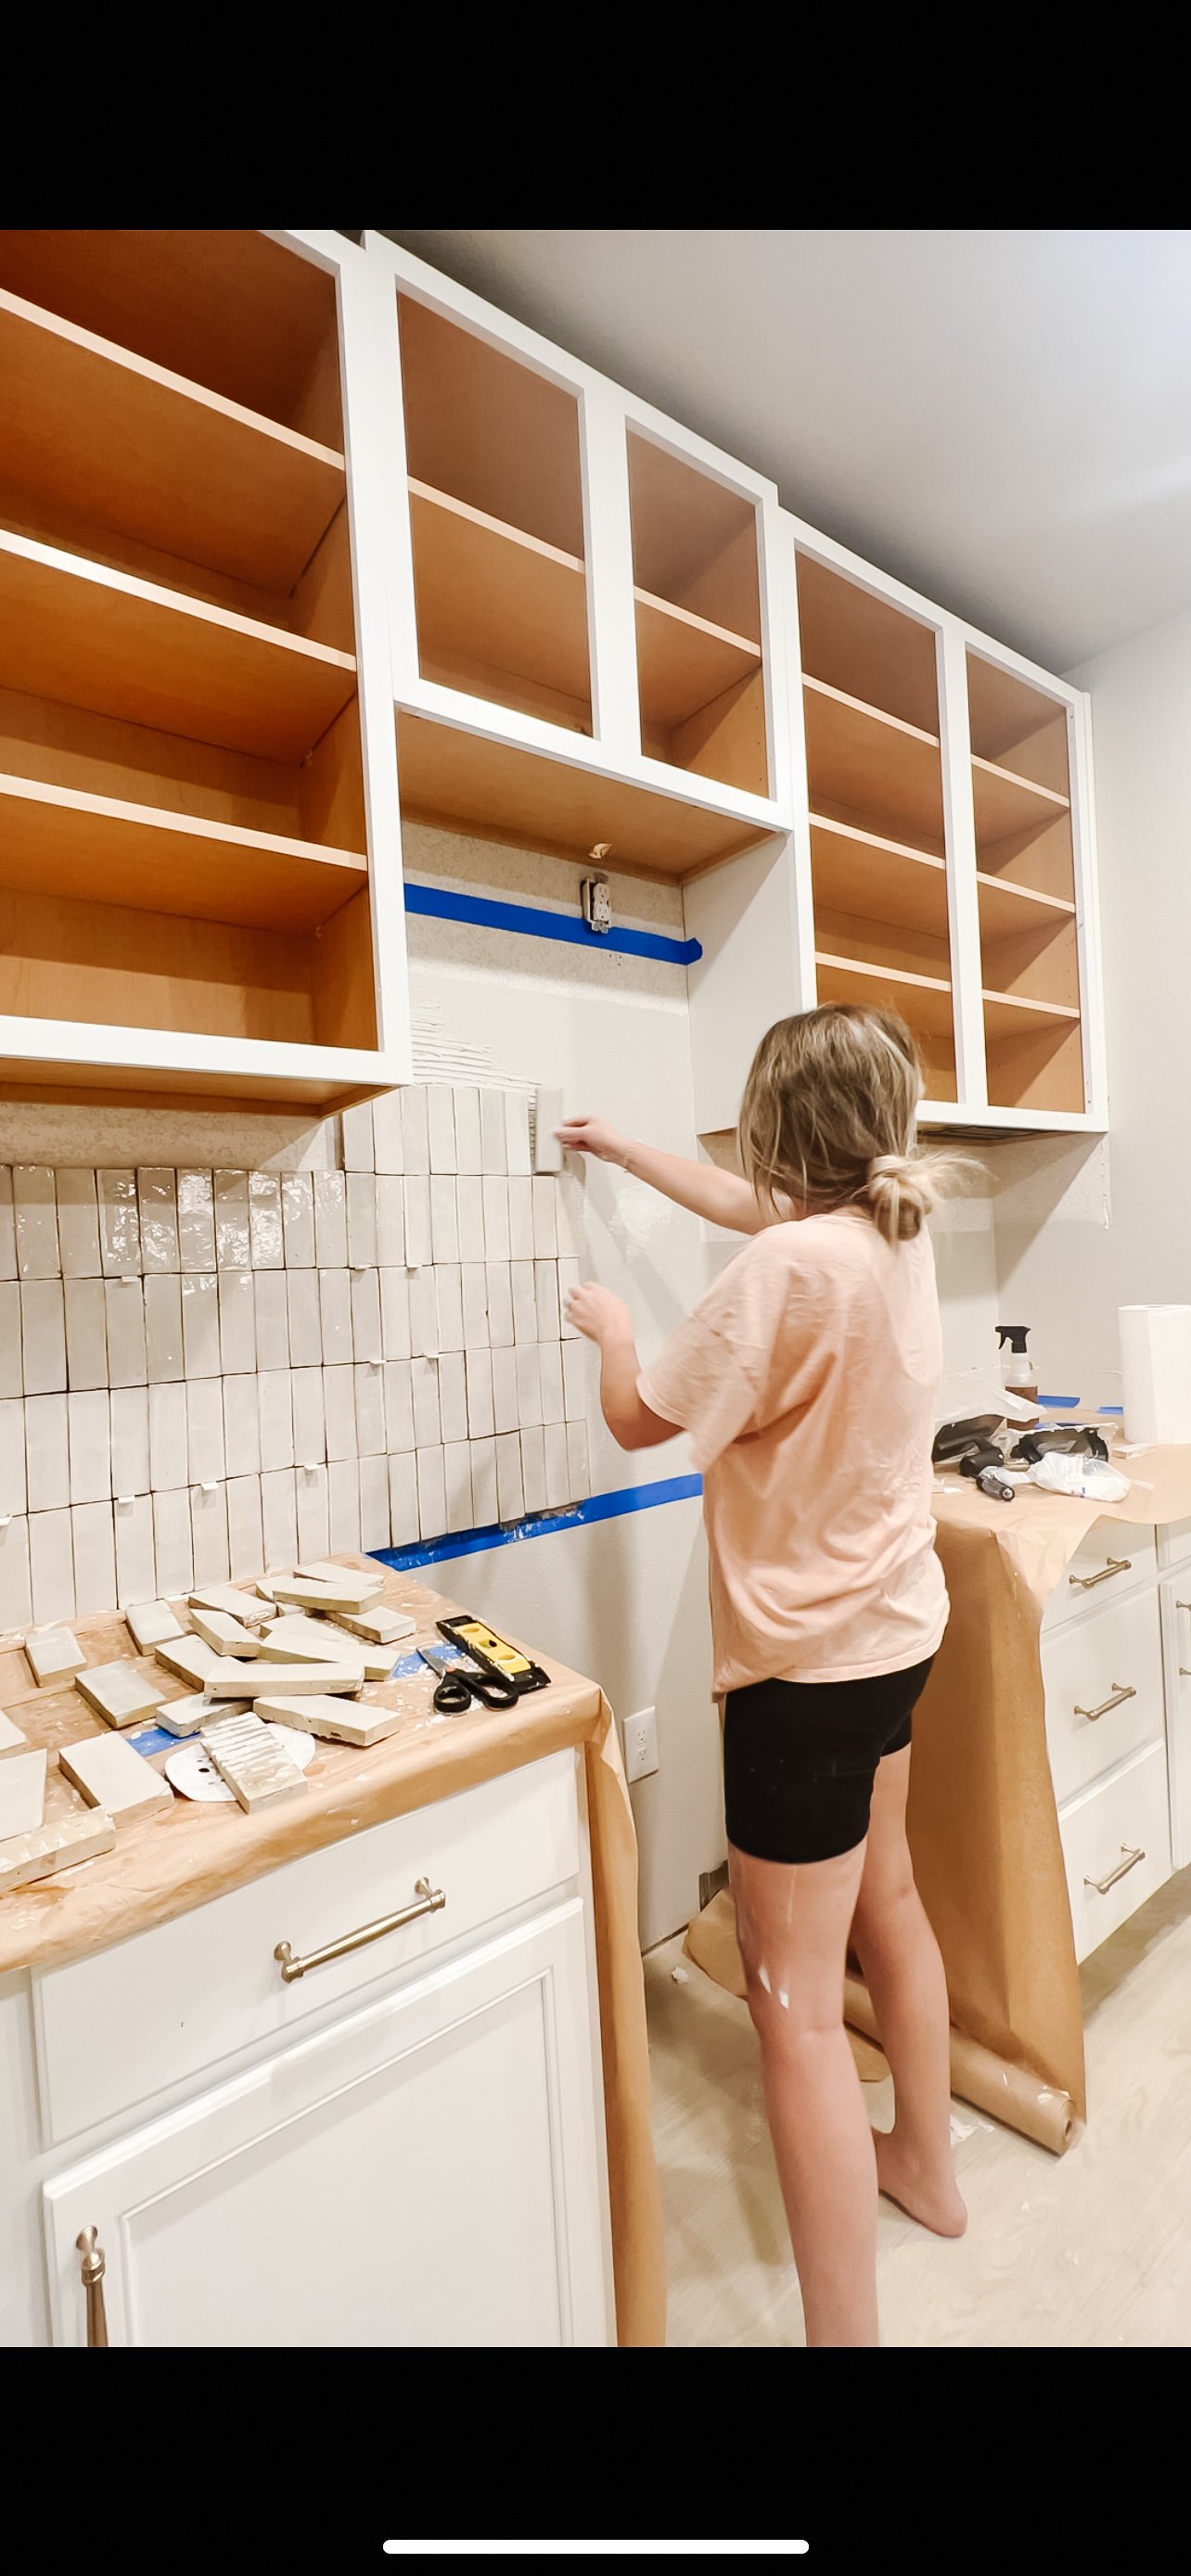
Zellige Extravaganza: Subway tile, it's time to move aside. We're embracing the trendsetting allure of zellige backsplash, specifically those stunning 2x6 rectangles in a natural white finish. These tiles spoke to me since discovering them, so if you would like to apply it to your space click here to secure yours [link to product] ✨ Get ready for a texture-rich, visually captivating focal point. We also love these two alternatives for a slightly different style check them out here.
DIY Vent Hood Magic: Instead of splurging on a new vent hood, we're embracing our creative spirit and crafting a custom under-cabinet version that promises a high-end look without the hefty price tag.
Appliance Refresh: The bulky over-the-range microwave is bidding adieu, replaced by a more petite version destined for the pantry. And for a true budget win, we scored a fantastic deal on a used fridge on Facebook Marketplace—proof that treasure hunting can pay off! Pro tip: Facebook Marketplace is a hidden gem for kitchen appliances! [link to website]
Cabinet Choreography: To create an airier, more spacious feel, we're embarking on a cabinet elevation project. By raising them a few inches, we'll visually expand the kitchen, inviting a sense of light and flow. Here’s a link to the cabinet hardware.
Paint Perfection: The walls and cabinets are eagerly awaiting a fresh coat of paint, but the color remains a mystery—for now. Stay tuned to my LTK page, where I'll reveal my favorite paint brands and colors: [link to page]

Progress and Challenges: A Tale of Triumph and Crusties
We've already rolled up our sleeves and made significant progress! The trim around the sliding glass door is history, the microwave and cabinets have vacated their former positions, and the walls are prepped for their backsplash adornment. Plus, the new fridge is sparkling clean and ready for its grand debut.
But let's be honest—no renovation journey is complete without a few challenges. Those cabinets were surprisingly heavy (hello, impromptu weightlifting session!), and we uncovered some...shall we say, "interesting" surprises lurking beneath the oven. Note to self: add "deep clean under appliances" to the monthly chore list.
Next Steps and Stay Tuned for More
The backsplash installation is next on our agenda, followed by the paint color and the construction of our DIY vent hood masterpiece. Be sure to follow my social media channels for behind-the-scenes sneak peeks, DIY tips, and a healthy dose of renovation realness!
The Transformation
We tackled these challenges head-on, implementing several key changes:
Replaced appliances: Sleek and modern appliances in neutral tones add a touch of luxury while improving functionality.
Painted cabinets: A fresh coat of paint in a calming shade transformed the cabinets, giving them a vintage feel and brightening the space.
Breathtaking backsplash: The pièce de résistance is the stunning zeilliege tile backsplash with its unique horizontal pattern. It adds a touch of Moroccan flair and visual interest.
Extended island: The expanded island provides more workspace and storage, making the kitchen more functional and inviting.
Smart storage solutions: Built-in shelves and organizers maximize space and keep everything clutter-free.
Replaced hardware: New hardware complements the vintage aesthetic and adds a polished touch.

The Impact
The result is a kitchen that is both beautiful and practical. The calming atmosphere makes it a joy to spend time in, while the smart storage solutions and improved functionality make it a dream to cook in.

This renovation proves that you can achieve a stunning transformation without breaking the bank. By focusing on key elements like vintage touches, smart storage, and clever design choices, you can create a kitchen that reflects your personal style and meets your needs perfectly.
Let’s work together.
Interested in working together? Click the button below for more info and we will be in touch shortly! We can't wait to hear from you!